

Playing with GIMP is never boring, every time you do some experiment you come to know of some cool effect. The best part is the filters, which if applied properly, can produce jaw dropping effects. While experimenting with GIMP i came to know that how easily glassy texts could be created with gimp. Although i am not a image maker, or a GIMP expert, i will try my best to describe this process. I have broken down this process in some sections, each one describing how to make each image effect component. Let’s start.
Glass Text
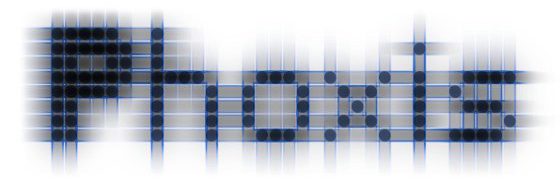
[tweetmeme source=”phoxis”]
- Create a new 1280×1024 or a 2560×2048 image (your best monitor resolution, or double of it) with a black background.
- Select Text tool, select a big area and type in a text. I have used Kharnorric font, downloaded from internet.
- Change the color of text to white {#ffffff}, text size to fit the selection and position to justify.
- Then right click the text layer and select merge down. This will remove the text properties and make the text you wrote into just an image. After this you will not be able to alter the text.
- Now apply the below filters with appropriate parameters so that the effect looks the best for you and looks good in your display. I have provided the parameters which i have used in curly brackets.
Filters -> distorts -> emboss {Azimuth=236, Elevation=144, Depth=90}
Filters -> Blur -> blur
Filters -> Edge Detect -> Neon {Radius=4.78, Amount=0.07}
Filters -> Enhance -> Sharpern {Sharpness=50}
Filters -> Artistic -> Softglow {Glow Radius=50, Brightness=0.85, Sharpness=0.90}
Select the text portion then Layer -> crop to selection
Color -> Colorify To Alpha -> From:{#000000}
The first step will emboss the text, next we blur the text, this is needed for the next step. When Neon edge detecting the sharp color transitions will get white, in this case the edges would get white. edges of the text will remain. If this layer was not blurred then the neon edge detection would result in jagged edged, and bad looking fonts instead of smooth edges. The Azimuth will control the white lining of the texts when applying Neon edge detection. Here you can do some research to get the white text outline as per your need. Then the layer is sharpened to compensate the blur. The softglow is applied to make a glowing effect of the text, so not apply too much of it, even it will look good when working, at some later time too much soft glow looks very bad. Then we select the text and crop only the text area. Note carefully when embossing, the values are very important which actually set how the text will look. Then apply the colorify to alpha and make the black background to alpha. And that’s it you get the basic glass text.
Name this layer “glass_text”
Click “New Layer” button in the layer window and floodfill it to black {#000000} , send the new layer to bottom and rename it to “background” , so that we have the glass texts glowing out of the dark.
Below we serially present the screenshots of the above process.


Glass Text Reflection
- Select “glass_text” layer, click the layer duplicate button on the Layer Window, and send this layer just below the “glass_text”. Name this duplicated layer “glass_text_reflection”
- Select Flip Tool from tool box, select Flip Type to “Vertical” from the tool configuration.
While the “glass_text_reflection” is selected click on that layer, to flip it vertically. - Select Move Tool, and while Shift is pressed drag the flipped layer below the original text
Drag down a guide to make a reflection plain reference and place both the “glass_text” and “glass_text_reflection” equally separated from the guide. Use the arrow keys for fine movements of the layers. - With the Rectangle Selection tool select an area, such that 40 to 50 percent of the lower part of the “glass_text_reflection” layer is inside the selection. Now feather the selection with a good high value of about 200 to 250 pixels.
Select -> Feather {200px} - Press Delete button once to feather delete the section, you can try hitting the Delete button twice and see how the effect looks and keep it if you like. Now the reflection will fade outward.
The below screenshots represent the above process.


Glass Sparkle
Here we will make the text sparkle in 2 (or 3) places of the text. We will draw the sparkles in the brightest edges of the text. We will make a small (1pixel) spot on a transparency layer as if that it is on the glass text font, and then make the spots sparkle.
- Create a new Transparency layer, and name it “glass_sparkle”, and bring it at the top.
- Select the Pencil Tool.
- Select the smallest brush {Circle (01)}
- Select the foreground color to White {#ffffff}
- Select the “glass_sparkle” layer and click on the points only once where you want the text to sparkle.
- Click only a few edges of the text where you want it to sparkle (2 or 3).
Toggle the visibility of the “glass_text” layer to see actually where you have created the white spots. - Select The dots individually with the Rectangle Selection tool, and apply Sparkle filter as below to each of the dots individually. For each dot slightly change the parameters so that the three dots create different looking sparkles.
My initial setting for First Dot:
Filters -> Light And Shadow -> Sparkle {Luminosity Threshold=0.001,Flare Intensity=0.50, Spike Length=20, Spike Points=4, Spike Angle=15, Spike Density=1.0, Transperency=0.0, Random Hue=0.0, Random Saturation=0.0, Select Natural Color, Uncheck all check boxes}
Changes for Second Dot:
Spike Angle changed to: 45
Spike Length changed to: 60
Spike Points changed to: 2
This is a matter of personal taste, so you should keep on researching and make trial and error and see which parameters come with the best.
After this select a rectangular portion of the “glass_sparkle” layer include all the sparkles and crop the layer to the selection. this will keep the sparkle layer compact by only keeping the needed area.
Make the “glass_test” layer visible from the Layer window.
Put the “glass_sparkle” Layer just below the “glass_text” layer.
Carefully check the below screenshots

Sparkle Reflection
We could have applied the sparkle to the text and then created the reflection of the text along with the sparkles but this reflection is done separately so that it can be removed or modified at any time, and manually adjusted. We will do this just like as the text reflection.
- Select the “glass_sparkle” layer, and duplicate the layer from the Layer Window, and name the duplicated layer “glass_sparkle_reflection”, and make sure that it is below both the “glass_text” layers.
- Select the Flip Tool select to flip vertically and then click on the “glass_sparkle_reflection” layer.
- Now move the flipped layer on the reflected text on the proper positions where the sparkles would appear when reflected. This could be easily done if you add guides to the bottom and left side of the “glass_sparkle” layer and then use them for reference for the “glass_sparkle_reflection” layer. At last remove the guides.
The image sparkle reflection now looks like below.


Reflection Plain
There is no reference plain line on which the glass text stands on. You only can imagine it, we will now create that plain which will make this picture more complete. The reflection plain will be just between the “glass_text” and “glass_text_reflection” layers. Now add a horizontal guide just between these two layers and create the plain.
- Create a new transparency layer from the layer window, and name it “reflection_plain”. Place the layer above the “*_reflection” layers. Select this layer and do the following.
- Select a large rectangle from just below Phoxis text in the “glass_text” layer. This should be big enough so that it goes out of the image borders. Now feather the selection by 20 pixels.
Select -> Feather { Feather=20px} - Select the foreground color as white {#ffffff}.
Select the Blend Tool , and set the below parametersBlend Tool -> {Gradient=FG to Transparent, Offset=0.0, Shape=Linear, Repeat=None} - To make the blend the gradient click just a bit below the top selection line (the top line of the rectangular selection) keep the mouse button pressed, press Ctrl so that the dragging be straight and then drag the mouse down to about half a way of the rectangular selection and release the mouse and Ctrl buttons.
- Now set the transparency of this layer so that it looks okay (check “Setting Transparency”)
The length of the FG to transparent blend depends upon look and choice. A very short length leaves the bottom half of the screen dark.
We have described how to draw the gradient with the help of screenshots below.


Setting Transparency
Now for some transparency settings to be done to make the picture better. Set the Opacity levels in the Layer window to each layer as shown below.
glass_text -> 90%
glass_text_reflection -> 70%
glass_sparkle -> 50%
glass_sparkle_reflection -> 15%
reflection_plain -> 45%
The sparkle and its reflection’s transparency needs to be adjusted upon taste. Also looks different in different displays and same display different settings. It’s good to keep it mild. Also the major layer is the “reflection_plain” do not set it too bright or it would look bad, its better to keep all light.
And here is the finished basic product without any other effects.

Effects
After we have finished the glassy text, we either can keep it super simple and keep it as it is, or we can add some effects to the background of the text and make it super cool. If you want it super simple then i will tell you to keep the text font size lower, it looks professional. Coming to effects, I have prepared an image with the glassy text and some background effects which I will present below after this section ends. I am not detailing hoe I applied the effects with screenshots, but i am definitely describing how i added them.
The effects were:
- The glassy text was brightened with the help of curve tool
- The reflection plain is also brightened
- The top upper planet view was cropped and rotated from another picture then applied black
to alpha , the transparency was set and placed on the top left. The reflection of the planet was created, but the reflection image was desaturated first. - On the top right the three pulsars are created with Gradient flare, or it could also be created by just with the blending tool and the shape set to spherical.
- The top right flame spark on the ‘i’ was done by the render flame tool. This took a long time for me to make, doing trial and errors.
- The sphere in front of the glassy text was taken from another image made by me in GIMP.
- And at last a wide strip was added on the background with #1a1a1a , and the top and bottom strips are kept to #000000 . And here is the final product which i use in my desktop wallpaper.
The Final Product
And this is it which ends up in my desktop, a fully personalized unique wallpaper.

First Publish Information : This article was first published on linuxforu.com (LFY), under Creative Commons Licence. Link: http://www.linuxforu.com/teach-me/learn-image-manipulation-and-create-a-glassy-wallpaper-on-gimp/
 Click Here To Read The linuxforu.com version by the author
Author: Arjun Pakrashi

This work is licensed under a Creative Commons Attribution-Share Alike 3.0 Unported License.

Simply awesome….
great! thanks for posting this. :)
Adding the sparkles isn’t working for some reason. Everytime i select the points i make individually the sparkle filter isnt getting added to either of them.
I think you are applying the sparkle effect on a wrong layer, or a layer which has transparency, or you might not have put the white spots with the pencil first.
Just kidding i realized what i did wrong.